Sunday, December 21, 2014

Pecan Shortbread Cookies


Updated November 2019


I've always loved "Pecan Sandies" and other Pecan Shortbread Cookies, but this was my first attempt at making them at home. 


Of course, I've made those cute round Russian Tea Cookies dusted with powdered sugar, and other pecan cookies before, but this time I wanted a true Pecan Sandie-type cookie. 
After a little experimenting, I think I've got it!


RECIPE
Ingredients
1 2/3 cups finely chopped pecans (6 ounces)
2 sticks unsalted butter, softened
1/4 cup granulated sugar
1/4 cup packed light brown sugar
1 teaspoon pure vanilla extract
1 teaspoon salt
1 3/4 cups all-purpose flour

Method
Preheat oven to 350°F with rack in middle.

In the bowl of a stand mixer, blend together butter, sugars, vanilla, and salt in a bowl until combined well. Mix in flour and chopped pecans until a soft dough forms (dough will be slightly sticky).

Form 1-inch balls of dough and arrange 2 inches apart on two ungreased baking sheets. Flatten balls to 1/3 inch thick using the bottom of a glass (flour bottom).

Bake, 1 sheet at a time, until edges are golden, about 15 minutes. Cool cookies on sheet 5 minutes, then transfer to a rack to cool.

Yield:  Approx. 3 dozen

Option - Keep 36 pecan halves aside and top each pressed cookies with one pecan half prior to baking.


Also seen on Weekend Potluck

Enjoy,

Mary

© Cooking with Mary and Friends. Unauthorized use and/or duplication of this material without express and written permission from this blog’s author and/or owner is strictly prohibited. Excerpts and links may be used, provided that full and clear credit is given to Cooking with Mary and Friends with appropriate and specific direction to the original content.

Saturday, December 20, 2014

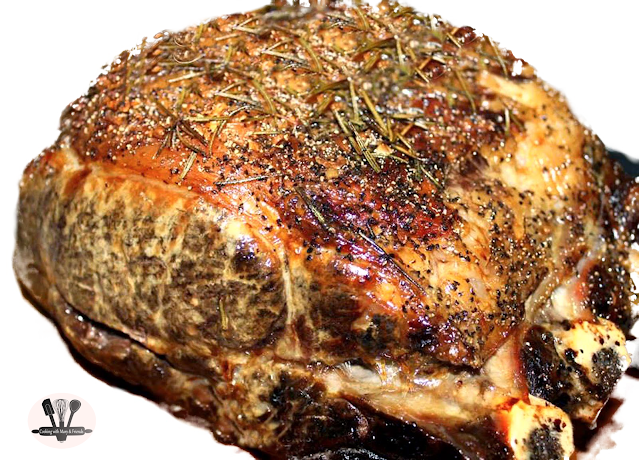
Prime Rib of Beef Roast


Updated and Revised December 2021


We almost always have Prime Rib of Beef Roast during the holidays, typically for Christmas Eve dinner. When prepared and cooked properly nothing beats it. Traditionally served with Yorkshire Pudding and au jus or gravy, it's a family favorite.


This year we were fortunate to be able to purchase our Prime Rib of Beef from West Ridge Farms- Premium Beef 
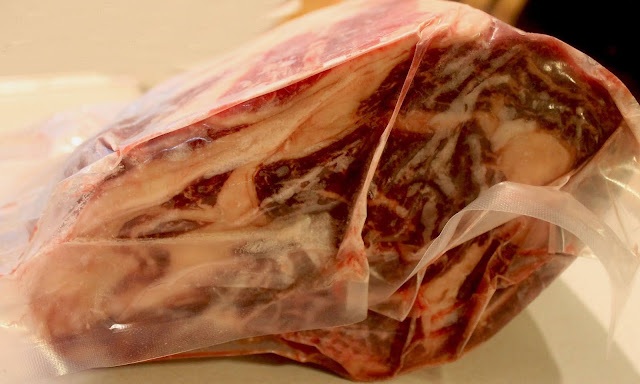
but no matter where you purchase it, look for a piece well marbled. Choose a rib roast that has a bright color with milky white fat. Avoid dull-colored meat and yellow fat.

Butcher shops many times will cut the ribs off the roast, then tie them back on, for easier carving. This is usually done at no cost, and I personally love the bones on the rib roast because they impart so much flavor. Don't forget to save the bones to make delicious Beef Bone Broth. That bone broth can be used with leftover shaved pieces of prime rib for delicious French Dip or open faced sandwiches. #useitall #zerowaste


A full rib roast can be up to seven bones. If you are doing a smaller roast, then ask your butcher to cut your roast from the small end. The small end is closer to the loin and the large end is closer to the chuck. This means that generally, the small end is more tender and more desired. Now that you know, you can be one of the smart people, getting a better roast. 😀


Did you know?  Prime Rib or Standing Rib Roast is a cut of beef from the primal rib, one of the nine primal cuts of beef. While the entire rib section comprises ribs six through 12, a standing rib roast may contain anywhere from two to seven ribs.

It is most often roasted "standing" on the rib bones so that the meat does not touch the pan. An alternative cut removes the top end of the ribs for easier carving.


Most people think that the word "Prime" in Prime Rib means it is USDA Prime Grade. But unless the official USDA designation is attached to the rib roast, it is not USDA Prime certified. The word "Prime" by itself only describes the most desirable part of the "rib section" of the beef regardless of the USDA (US Department of Agriculture) Grade.


The top grades of beef are USDA Prime, USDA Choice and USDA Select with Prime being the most superior. 


A Prime Rib Roast is also often referred to as "Standing Rib Roast." It is cut from the rib section which is one if the eight primal cuts of beef and is comprised of ribs 6 through 12 and a standing Prime Rib Roast can be 2 to 7 ribs. Once roasted to the desired temperature, it is sliced into portions which are called "Prime Rib."


It is interesting to note that a slice of uncooked prime rib roast is really a "rib steak" which includes the "rib eye" portion.


RECIPE 
Ingredients
1 Prime Rib Roast 
1 tbls. olive oil
1-2 tsp. minced garlic
2-3 fresh rosemary sprigs (optional)
Course-ground black pepper

Method
Remove roast from the refrigerator and let it come to room temperature about 1 hour prior to roasting. Lightly oil the roast all over with olive oil. Rub on minced garlic, sprinkle well with pepper and top roast with 2-3 sprigs fresh rosemary.

Preheat oven to 450. Place roast rib side down, fat side up, so roast is "standing up" in roasting pan. Sear roast for 15 minutes.

Reduce heat to 325 for the remainder of the cooking time. Time will vary dependent on size of roast, however the roasting time is approximately 13-15 minutes per pound. 

For optimal flavor and texture, cook prime rib to:
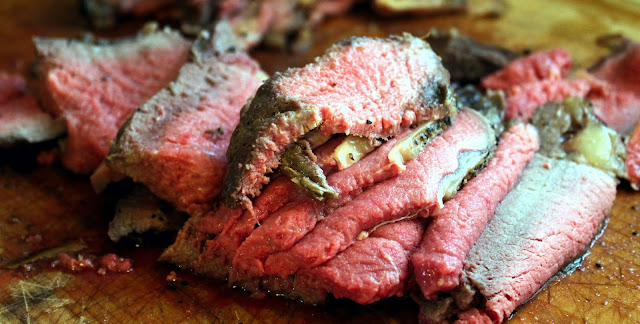
  • medium rare or an internal temperature of 130-135. Remember the internal temperature will rise as the roast rests. 
  • If you want it more well done, cook it a few minutes longer, or until the internal temperature is 140-145. 
When checking the temperature of your prime rib roast, insert meat thermometer so tip is in thickest part of beef, not resting in fat or touching the bone.

Remove roast from oven, cover lightly with foil and let rest 15-20 minutes before carving; and longer if you're going to make some Yorkshire Pudding.


Enjoy,

Mary

© Cooking with Mary and Friends. Unauthorized use and/or duplication of this material without express and written permission from this blog’s author and/or owner is strictly prohibited. Excerpts and links may be used, provided that full and clear credit is given to Cooking with Mary and Friends with appropriate and specific direction to the original content.

Wednesday, December 17, 2014

Bourbon Brown Sugar Mustard


I saw this recipe the other day over on my friend, The Duchess of Cansalot's page, and I knew I just had to try it.  I'd already made Spicy Brown Mustard and Oktoberfest Beer Mustard, so this was a "must make" to add to the collection.

Bourbon, brown sugar and mustard seeds all combine in this tangy, sweet, spicy, with a bite mustard.


Did you know?  Mustard is a condiment made from the seeds of a mustard plant (white or yellow mustard, Sinapis hirta; brown or Indian mustard, Brassica juncea; or black mustard, B. nigra). The whole, ground, cracked, or bruised mustard seeds are mixed with water, salt, lemon juice, or other liquids, and sometimes other flavorings and spices, to create a paste or sauce ranging in color from bright yellow to dark brown. The tastes range from sweet to spicy.

Commonly paired with meats, sushi, pizza, breads, potatoes, and cheeses, mustard is a popular addition to sandwiches, salads, steaks, tofu, yogurt, hamburgers, and hot dogs. It is also used as an ingredient in many dressings, glazes, sauces, soups, and marinades; as a cream or a seed, mustard is used as a condiment and in the cuisine of India and Bangladesh, the Mediterranean, northern and southeastern Europe, Asia, the Americas, and Africa, making it one of the most popular and widely used spices and condiments in the world.

The Romans were probably the first to experiment with the preparation of mustard as a condiment. They mixed unfermented grape juice, known as "must,"with ground mustard seeds (called sinapis) to make "burning must," mustum ardens — hence "must ard." A recipe for mustard appears in Apicius (also called De re coquinaria), the anonymously compiled Roman cookbook from the late 4th or early 5th century; the recipe calls for a mixture of ground mustard, pepper, caraway, lovage, grilled coriander seeds, dill, celery, thyme, oregano, onion, honey, vinegar, fish sauce, and oil, and was intended as a glaze for spit-roasted boar. (source: Wikipedia)


RECIPE
Ingredients
1 cup bourbon
½ cup water
1 cup brown mustard seeds
½ cup cider vinegar
6 tbls dry mustard powder
1 cup lightly packed brown sugar
1/4 cup raw local honey

Method
Heat bourbon, water and seeds until mixture just comes to a boil; remove from heat and steep for about 2 hours.

Transfer soaked seeds to the bowl of a food processor; process until smooth, or leave grainy. Add vinegar, mustard powder, brown sugar, and honey; process briefly to mix. Transfer to a medium saucepan.

Over medium heat, stirring constantly, bring mustard to a boil; continue to boil mustard until it reduces to your desired thickness, but remember it will thicken further upon cooling. Taste and adjust seasonings to your likening (add additional water if needed if the mustard is getting too thick).

Fill hot jars to a generous ¼-inch head-space, tamping down the mustard into the jar. Remove air bubbles by running a plastic knife around edges and middle of the jar. 

Wipe rims, top jars with lids and seals and process in a boiling water bath for 10 minutes. Allow to rest for 5 minutes in the hot water prior to removing the jars to a clean towel on your kitchen counter-top. Let sit undisturbed 24 hours. Store in pantry.

Shelf life is one year.  Opened jars need to be refrigerated.

Note - As with all homemade mustard, the flavors develop and mellow over time, so it's best to let them sit for a few weeks, or even a month or more, before using.

Yield:  3 - 8 oz. jelly jars

Enjoy,
Mary

© Cooking with Mary and Friends. Unauthorized use and/or duplication of this material without express and written permission from this blog’s author and/or owner is strictly prohibited. Excerpts and links may be used, provided that full and clear credit is given to Cooking with Mary and Friends with appropriate and specific direction to the original content.


Tuesday, December 16, 2014

Stratford Hall Ginger Cookies


Updated and Revised November 2021


These cookies have been a family favorite for many, many years. They were always baked around the holidays, and I used to look forward to the smell of them baking ... nothing beats that delicious smell of molasses, ginger, and cloves. Delicious, soft and chewy!


My mother originally began making these in the 1980's after she toured Stratford Hall, in Westmoreland County, Virginia, the home of four generations of the Lee family of Virginia, including two signers of the Declaration of Independence. 
It is also the birthplace of Robert Edward Lee (1807–70), who commanded the Confederate Army of Northern Virginia during the American Civil War, and then became the president of Washington College, which later became Washington and Lee University.


RECIPE
Ingredients
1 1/2 cups butter, melted
1/2 cup molasses
2 cups sugar
2 large eggs
4 cups flour
4 teaspoons baking soda
2 teaspoons cinnamon
1 teaspoon ginger
1 teaspoon clove
granulated sugar used to coat cookies

Method
In a large mixing bowl, combine melted butter, molasses, sugar and eggs beating well.

Sift together flour, baking soda and spices.  Add this to the melted butter, molasses, sugar and egg mixture, beating well.

Cover bowl with plastic wrap and refrigerate the dough for at least one hour.

Take small sections of dough out at a time, keeping the rest refrigerated, and roll pieces of  it into small 1" balls, then roll balls in granulated sugar. Repeat with remaining dough.

Place on prepared baking sheet sprayed with cooking spray, or lined with parchment paper.

Bake in 350 oven 8-10 minutes or until slightly firm and well browned.

Yield:  5 dozen cookies

Cook's Note - the dough and the cookies both freeze well.

Also seen on Weekend Potluck

Enjoy,

Mary

© Cooking with Mary and Friends. Unauthorized use and/or duplication of this material without express and written permission from this blog’s author and/or owner is strictly prohibited. Excerpts and links may be used, provided that full and clear credit is given to Cooking with Mary and Friends with appropriate and specific direction to the original content.

Monday, December 15, 2014

Bavarian Potato Salad


Oh I'd been searching and searching for a good Bavarian Potato Salad. One that would remind us of the years we were stationed in Germany, and enjoyed all kinds of German delicacies.

This Bavarian Potato Salad is one to enjoy year 'round! It pairs perfectly with a variety of pork dishes, but is equally good served with Brats or hot dogs, and grilled or roasted chicken.

I finally found one we all really love and agree it's the most authentic we've been able to find. In fact, a very good friend of mine, Michele Wynn Gerhard, a renowned Chef who is unfortunately no longer with us, spoke lovingly about this recipe when I shared it with her.


"THANK YOU, Mary! In my opinion, this is THE German potato salad recipe!!! Seriously! I can definitely picture my German mother-in-law in her kitchen. I can definitely smell the Kartoffelsalat from here, and I can almost taste it! The picture looks almost identical to hers. I'm talking MEGA drool here! If I'm ever able to get in the kitchen and cook again, this will be the first thing I make! KEY - the right potato (never Russet "baking" potatoes!), right balance of vinegar & oil, using a good MILD vinegar, and please, please, please don't omit the chicken (or beef) broth, even if it sounds weird to you. YES, pour the vinegar over the warm potatoes, and yes, to just a small amount of sugar. It enhances the flavor somehow, but doesn't make the salad taste sweet. And, as "Mutti" says, NEVER serve hot or cold, always warm, by which I mean room temperature.

In all these years, I've never seen a recipe that came so close to describing exactly what Mama Mizzi did 1,000's of times, at least. Her kids, grandchildren, and daughter-in-laws learned to make it by watching her. Ditto for all her best dishes. I've never seen her consult a recipe, not even when baking. Oh yeah, the fresh herbs are important, too. She always had a great garden and used whatever was available to her there - always parsley & chives, dill if she had it. Yes, freshly ground black pepper, and she was just as fussy about her vinegar as she was about the type of potato she used. Thanks again, dear Mary... this is a treasure, for sure!" Love, Michele


RECIPE
Ingredients
5 pounds Yukon Gold or Red potatoes (not Russet)
1 small onion, finely chopped
1/2 pound bacon, cooked and crumbled
1 tbls. dill weed
1/4 cup parsley leaves
1/4 cup chicken stock
1 tsp. sugar
2 tsp. sea salt
1 tsp. course-ground black pepper
3/4 cup red wine vinegar
1/2 cup vegetable oil (or less; add small amount at a time)

Method
Cook bacon until crispy. Drain the bacon on a paper towel and save about 2 Tablespoons of the fat. Finely chop the cooked bacon and set aside. Next dice the onion.

Boil the potatoes, skin on, until fork tender (approx 20-30 minutes) in water. Drain and let sit in cold water to cool down enough to handle; gently rub off the peel.

Once all of the potatoes are peeled, cut each potato in half and then bite size pieces, or slices, however you prefer.

Pour the vinegar, salt and pepper on to the warm potatoes and wait for a few minutes, stirring once. Let the mixture absorb into the potatoes, which takes just a few minutes.

Add the bacon, onion, dill weed, the reserved bacon fat, and chicken stock.

Gently stir with a large wooden spoon being careful not to press the potatoes too much.

Add about 1/2-3/4 cups of the vegetable oil and combine (you may need more later).

Add 1 teaspoon of sugar, taste and adjust the salt, if necessary. Add a little more vinegar, if necessary so it has a mild tart taste.

The potato salad should have a nice shine to it, but not be too oily. Add a little oil at a time, until you see a very light sheen. Add the parsley last and stir to combine.

Serve at room temperature.

Adapted from A Feast for the Eyes

Enjoy,

Mary

© Cooking with Mary and Friends. Unauthorized use and/or duplication of this material without express and written permission from this blog’s author and/or owner is strictly prohibited. Excerpts and links may be used, provided that full and clear credit is given to Cooking with Mary and Friends with appropriate and specific direction to the original content.
Brandied Fruit Cake


I should start by saying I don't like fruit cake. At least I don't like the kind with the candied citron fruit in it. To me that stuff was always nasty, so therefore, I never ate fruit cake.


That is UNTIL the day my friend, Liz, convinced me to try a piece of her fruit cake. She swore it didn't taste like traditional fruit cake, so I took the plunge.


Oh my goodness, this was the BEST fruit cake I'd ever had. Moist and delicious, made with real fruit "brandied" in a simple sugar syrup. It was so darn yummy.


Well that moment was many years ago, so I recently asked Liz if she remembered the fruit cake she made years ago, and she did ... but now she had to find the recipe, which I hoped she would, and she DID!  Then she sent it to me. Oh yes, I was in business now.

This recipe is circa the early 1960's and is also known to some as an Amish Friendship Cake. The process begins 6 weeks in advance making the branded fruit sauce, so you must plan ahead.

RECIPE
Ingredients
For Brandied Fruit Sauce
1 cup chunk pineapple, drained
1 cup maraschino cherries, drained
1 cup sliced peaches, drained
3 cups sugar
6 tbsp Brandy

Method
1st week:
1 cup chunk pineapple, drained
1 cup sugar
2 tablespoons brandy
Combine in a large glass container with a loose top. Stir occasionally.

3rd week:
1 cup sweet cherries, drained
1 cup sugar
2 tablespoons brandy
Stir occasionally

5th week:
1 cup sliced peaches, drained
1 cup sugar
2 tablespoons brandy
Stir occasionally

Sauce is ready to use in 6 weeks time from 1st week.

For Cake

1 cup melted butter
2 eggs
1/2 tsp salt
1 tsp baking soda
1 cup chopped pecans
1 3/4 cups sugar
3 cups flour
1/4 tsp nutmeg
2 cups brandied fruit sauce, DRAINED 


Method
Preheat oven to 350. Beat melted butter and sugar together. Beat in eggs. Sift dry ingredients together and add to butter mixture. Add 2 cups brandied fruit sauce, drained & 1 cup chopped pecans (makes a very thick batter).


Grease and flour, or spray with baking spray, one Bundt Pan, Tube Pan or 5 mini-loaf pans. Bake large cake for 1 hour, or longer as needed until toothpick inserted comes out clean (mini loaves 40-45 minutes.) It will have a thick crust but will be nice & moist inside.

Yield:  1 large Bundt or Tube Pan or 5 mini-loaves


Cook's note -
mini-loaves freeze very well. Wrap small loaves in plastic wrap, place in zip-top bags, and store in the freezer.

Enjoy,
Mary

© Cooking with Mary and Friends. Unauthorized use and/or duplication of this material without express and written permission from this blog’s author and/or owner is strictly prohibited. Excerpts and links may be used, provided that full and clear credit is given to Cooking with Mary and Friends with appropriate and specific direction to the original content.
Thursday, December 11, 2014

Classic Sourdough Bread


I really love sourdough and have had my share of sourdough starters over the years. I like to watch the starter as it develops over the course of a few days; watching it get all bubbly, swell and expand as it "does its thing." 

Sourdough Starter

One thing you have to have is TIME and PATIENCE. Sourdough takes awhile to make, but the results are so worth the time you invest.

There are many, many starter recipes out there, and for the most part they are all very similar. I chose one this time around that does use packaged yeast, which was simply a way to make it a bit easier.

It developed very quickly and the results were great. (starter recipe from Grit.com)

Sourdough Starter 
1 package dry yeast
2 cups warm water
2 cups flour

Mix ingredients in a large non-metal bowl. Pour blended ingredients into a LARGE jar or bowl with a loose fitting lid and let stand at room temperature for 36 to 48 hours. The starter will swell and bubble as it "grows" so be sure to use a large enough container as it may double or triple in size as it "grows."  (I let mine stand for 48 hours)

Afterward, starter can be stored in refrigerator until needed.

When you need the starter, take it out of the refrigerator and let it come to room temperature before you use it. Stir starter before using it so that ingredients are blended together.

Every time you use some of the starter, you must replenish it. For example, if you use 2 cups starter, you must mix in 1 cup flour and 1 cup warm water. Then let it stand at room temperature for a few hours until it bubbles. It then can be stored in the refrigerator until it is needed again.

Sourdough Bread after 1st rise

A Few Hints about Sourdough Starter
If it separates with water forming on top and dough on bottom, stir well to make a smooth batter again.

Never use your entire starter. Leave 1 cup starter to make a new batch.

Cover sourdough container loosely, when out of refrigerator. Inside of refrigerator, you can add a lid because it is dormant in cold temperatures.

Sourdough can be kept in the refrigerator when not needed, but it takes at least a few hours at room temperature to start working again.

Sourdough reacts best at room temperature.

If your sourdough starter turns pink or red, shows signs of mold growth or smells putrid, throw it out and make a fresh batch of sourdough starter.

Make sure to share with friends so they can start their own sourdough baking.

Sourdough Bread after 2nd rise

Classic Sourdough Bread
Ingredients
1 cup ( 8 ounces) sourdough starter
1 1/2 cups (12 ounces) lukewarm water
5 to 6 cups All-Purpose Flour
1 tablespoon salt
1 tablespoon sugar (optional)
cornmeal to sprinkle on pans

Method
Pour the cup of starter into a large mixing bowl. Add the warm water and about 3 cups of flour. Beat vigorously. Cover this sponge with plastic wrap and put it aside to work. This period can be very flexible, but allow at least 2 hours and up to 8 hours. A longer period (at a lower temperature) will result in a more sour flavor.

Loaf shaped

After the dough has bubbled and expanded, remove the plastic wrap. Blend in the salt, sugar, and remaining 2 cups of flour. Mix until the dough comes together, then knead, using your hands, an electric mixer, or a bread machine set on the dough cycle, until the dough is smooth and elastic. Add only enough extra flour to keep the dough from sticking. Place the dough in a lightly oiled bowl, cover, and let it rise until doubled, 1 to 2 hours.

Divide the dough in half. Shape each half into an oval loaf, and place on a lightly greased, cornmeal-sprinkled baking sheet. * see option below for Onion Rolls or Mini-Loaves.

All baked

Cover, and let rise until doubled (this can take up to 2 hours). 

Place a pan full of hot water on the bottom rack of your oven and preheat to 450°F. Remove the cover, slash the tops, and bake for approximately 20 minutes, until golden brown. Remove from the oven, and cool on rack.

* Option - Add 1/4 cup dried minced onion to the dough.  Shape into 2 mini-loaves and 9 small onion rolls. After rising, brush tops with an egg wash (1 egg and 1 tbls. cold water whisked). Sprinkle tops with more dried minced onion and bake as per the above directions.

Yield: 2 mini-loaves and 9 rolls - OR - 4 mini-loaves - OR - 18-20 rolls


Onion Rolls


Mini-Loaves


As the sourdough develops the bread becomes more full of nooks and crannies

Cooks note - the longer you have the sourdough starter, the more developed the flavor becomes. The bread becomes more full of nooks and crannies making for an extremely tasty finished product. You many need to add additional yeast over time to reactivate. I only add 1/2 tsp yeast if this becomes necessary.

Recipe adapted from King Arthur Flour

Enjoy,
Mary

© Cooking with Mary and Friends. Unauthorized use and/or duplication of this material without express and written permission from this blog’s author and/or owner is strictly prohibited. Excerpts and links may be used, provided that full and clear credit is given to Cooking with Mary and Friends with appropriate and specific direction to the original content.
Sunday, December 7, 2014

Why Buy Food from Local Farms?

Sunny Cedars Farm
So why should you buy food from small, local family farms and markets? After all, it costs more, right? Meat in many instances costs much more than commercial products available in grocery stores. 

Thames Farm

So why do it? I do it because it tastes far superior to any conventional product; it's not loaded with antibiotics, added growth hormones, and million dollar words you can't pronounce. I want to know where my food comes from and how it was raised. 


West Ridge Farms - Premium Beef
So what about me, what is my background? My family has had a vegetable garden for as long as I can remember, and we now have a raised bed garden I call my "kitchen garden" where we grow a variety of produce. In fact my husband comes from a long line of people who farmed for generations, including his 2nd great-grandfather, Isaac Hill Marshall, who was a scientific farmer.
When I was growing up, my mother always cooked from scratch. I didn't know what a box cake mix was until I was a young adult because we simply never had them in our house. Oh, of course, my mother did take some shortcuts, but really not very many. She and my dad both cooked; she more simply, he liked to experiment with wine in foods, so something new was always coming out to be served ... some we liked, some we didn't, and some were "keepers" I make to this day ... and we always sat down to dinner together ... always at the dinner table and always, always, always as a family. This, I know, is what made a tremendous impact on me and how I wanted to raise and feed my family.

Wishbone Heritage Farms

I began this journey to "source our food" from local farms and markets a few years ago.  Why? Because I was tired of not knowing what was in our food. This stemmed from some things I'd seen via the Internet, but I was determined to find out for myself what this "just eat real food" business was all about.

Seldom Rest Farm

The very first time I ventured to a local farmer's market just blew me away. To see all that local, fresh produce and meet some of the farmers providing it was so awesome to me. Of course, you still need to do your homework and ask questions of the farmers you buy from ... do you use conventional or organic practices? In other words, do you spray with pesticides, or do you grow your food organically? Are you certified organic, or just have organic practices in place? 

Hill Creek Farms - Hartsville

In fairness, most small farms can not be certified organic due to the substantial cost, but if they are using organic practices, that's all I need. Most all farmer's are more than happy to share their farming philosophies and practices with you if you simply ask.  Don't like what you hear from one farmer, go to another, it's that easy!

Turkey Creek Bee Farm


Next, I began touring some local farms with a few like-minded friends who were also curious about today's farming practices. It's been fun, and educational and I've met some of the best people you'd ever want to know! 

And you don't always have to live "high 
off the hog" as the saying goes, buying the most expensive, premium cuts of meat. Pork shanks, as an example, are often overlooked, but when prepared properly as German Schweinshaxe or Pork Osso Bucco, they are delicious. Goat meat is also growing in popularity and is fairly inexpensive to purchase, as is ground chicken, turkey, or lamb you can use instead of ground beef in almost any dish.

Carolina Bay Farms

The other thing we've discovered is we eat less of the meat because it's more satisfying.  And believe me, my husband is a total carnivore. We used to cook bone-in chicken breasts and everyone would have their own. Now we cut the breasts in half (making 2 into 4 pieces) or grill them and slice the meat off one chicken breast for dinner, and use the other one for sandwiches, chicken salad, or a casserole another day. 

Old McCaskills Farm
We also use all of the product we purchase. In other words, if we buy a whole chicken, it gets cooked and the carcass is used for chicken stock/bone broth, which in turn is used in soups, stews, gravies, steamed rice, mashed potatoes and more.
With beef we have discovered lessor popular cuts such as Skirt Steak and Hanger Steak. Both are delicious, and very tender, again when prepared properly.

Paradise Acres Farm
The way to really save money on grass-fed beef is to buy it in larger amounts, such as a side or 1/4 side of beef. While that does mean more initial outlay it includes all cuts of beef from tenderloins to ground beef and everything in between. Don't have the freezer space yourself for that much beef? Consider what we did and go in on it together with other friends or family members, dividing it up between all participants. We recently did just this with some friends and now, months later, we are still enjoying it.

I'm proud to say I haven't bought meat, produce, or dairy products (butter, milk, cheese) in the grocery store for over a year now, and while it did take me more than 2 years to get there, I'm glad I did.

Recently some friends purchased meat products at a local farm for the first time and told me "More people just need to try it, they would really like it too. To be honest, I was a little skeptical at first about trying all grass-fed meat, but not anymore.  I did a price comparison for chuck roast at the grocery store today and the difference was less than $5 for the same weight."

I'm happy "I shop local" and support my local economy. Every bit of money spent with a local family farm, market or foods store helps them continue to do what they do best ... provide quality products for you and I to enjoy, and I say that's a win-win!

For more information about our food system, or to simply educate yourself, check out this video:
Fed Up


Until next time,
Mary

© Cooking with Mary and Friends. Unauthorized use and/or duplication of this material without express and written permission from this blog’s author and/or owner is strictly prohibited. Excerpts and links may be used, provided that full and clear credit is given to Cooking with Mary and Friends with appropriate and specific direction to the original content.


Wednesday, December 3, 2014

Craisin Jalapeno Jelly


Sweet, tangy, spicy, this jelly is perfect with cream cheese and crackers, or use it as a glaze on grilled pork or chicken. It is also the perfect "made at home" gift for holiday gift giving.


RECIPE
Ingredients
1 3/4 cup dry red wine (can use cooking wine)
1/4 cup red wine vinegar
1 - 5 oz. package Craisins (dried cranberries)
10-15 slices pickled jalapeno peppers (make your own)
1 tsp. course-ground black pepper
3 1/2 cups sugar
1 pkg. Sure-Jell (pectin)
4 -1/2 pint canning jars (8 oz.)

Method
In a large stock pot stir together the wine and craisins. Let sit 10 minutes for the craisins to re-hydrate.

Add vinegar, jalapeno pepper slices, black pepper and sure-jell. Bring mixture to a rolling boil over med-high heat stirring constantly.

Quickly stir in sugar and bring back to a rolling boil. Boil and stir 1 minute; ladle mixture into 1/2 pint canning jars.

Put jars in water bath canner with a rack on the bottom (any pot will do so long as the water covers the jars completely by 1-2").  

Cover and bring to a boil; reduce heat slightly and continue to boil 5 minutes.

Remove jars from canner and allow to cool on a kitchen towel.

Cooled jars can then be placed in kitchen cabinet. Keep any open jars in the refrigerator.

Jars are shelf stable for up to 1 year provided they remain sealed.

Yield:  4 - half-pint jelly jars (8 oz.)

Enjoy,

Mary

© Cooking with Mary and Friends. Unauthorized use and/or duplication of this material without express and written permission from this blog’s author and/or owner is strictly prohibited. Excerpts and links may be used, provided that full and clear credit is given to Cooking with Mary and Friends with appropriate and specific direction to the original content.

Monday, December 1, 2014

Greek Pastitsio


This Greek Pastitsio was so good tonight with ground lamb from Thames Farm. Macaroni noodles, oregano, cinnamon, onion, garlic and a Bechamel Sauce with some added Parmesan cheese all come together in this delicious, yet easy, dish.

Situated on 82 rolling acres Thames Farm is dedicated to raising healthy all-natural pastured Berkshire pork, pastured chicken and lamb. All our animals are raised on a natural diet and are never given antibiotics, steroids or any growth hormones. Our pastures are maintained chemical free.

And that is why I shop there often ... 

Ingredients
1 cup uncooked elbow macaroni
1 lb. ground lamb (turkey or beef may be substituted)
1 medium onion, chopped
1 garlic clove, minced
1 - 8 oz. can tomato sauce (make your own)
1 tsp. salt, divided
1 tsp. dried oregano
1/2 tsp. black pepper
1/4 tsp. ground cinnamon
1/2 cup grated Parmesan cheese, divided
3 tbls. butter
3 tbls. all-purpose flour
1-1/2 cups milk
1 egg, lightly beaten

Method
Cook macaroni according to package directions. 

Meanwhile, in a large skillet, cook beef and onion over medium heat until meat is no longer pink. Add garlic; cook 1 minute longer. Drain. Stir in the tomato sauce, 1/2 teaspoon salt, oregano, pepper and cinnamon; heat through.

Drain macaroni; place half of macaroni in a greased 9-in.-square baking pan. Sprinkle with 1/4 cup cheese. Layer with meat mixture and remaining macaroni. Set aside.

Preheat oven to 350 degrees. 

In a small saucepan, melt butter; stir in flour and remaining salt until smooth. Gradually add milk. Bring to a boil; cook and stir 2 minutes or until thickened.

Remove from the heat. Stir a small amount of the hot mixture into egg; return all to the pan, stirring constantly. Bring to a gentle boil; cook and stir 2 minutes. Remove from heat; stir in remaining cheese. Pour sauce over macaroni.

Bake, uncovered, 30-35 minutes or until golden brown. Let stand 10 minutes before serving. 

Yield: 4-6 servings

Enjoy,
Mary